Anyone who knows anything about construction will know just how important drywalls are in a building project. It offers, among other things, affordability, ease of use and durability. However, one thing that any experienced builder will tell you is that you can only get the best from drywall constructions when they properly installed.
To this end, we will be dedicating this article, though short, to providing you with some very basic tips that can help you as a DIYer with any drywall project in your Tampa home. Needless to say, working with professionals will make the whole process a lot easier. You can check out contractors like Drywall Tampa Pro to learn more about these professionals. If however you wish to try the DIY route, then read on to learn more.
We’ll take you through the process of pre-installation, installation and finishing. Understanding these different stages is necessary if your project will be successful.
Pre-Installation Considerations
Before you can begin the actual installation of the drywall, there are important pre-installation considerations to be made. There are three important considerations points that we will quickly address here.
Type of Drywall
Different parts of your home will require different types of drywall sheets. If for example you wish to install the sheets in a moisture prone area like your kitchen or bathroom, then it’s important that you go for the moisture-resistant variant. You must determine what types of sheets you will need and the quantity of each type.
Tools Required
A successful installation will largely depend on the efficiency of the workmanship which of course can be affected by the effectiveness of the tools used. To this end, it’s important that you know the right tools to use for this task. Some tools that you should have for this project include:
- Tape for measurement
- Saw
- Utility knife
- Trowel
- Drill
- T-square
- Level
- Screws
- Electric screw driver
With the above, you should be able to get your project completed efficiently. You can learn more about choosing the right tools for such a project in this article.
Measurement
While this may across as pretty obvious, it’s something that could easily be overlooked. It’s important that you carefully measure the space where you want to install the drywall. Doing this will give you a good idea of the number of drywall sheets that you will require. You most certainly don’t want to get more or less than you actually need. Measurement should also be done considering the different types of sheets that will be required in the different parts of your home.
Installation Tips
If you think that installing drywall sheets is a difficult project, then you will be right or wrong depending on your understanding of the process. In this section, we’ll share with you, important tips that can make the installation a lot easier.
Tip 1 – Preparing the Area
The first thing to do before you begin to install the sheets is to thoroughly clean the area where the sheets will be installed. Ensure that the entire area is dry and that every debris is completely removed so that the sheets can have a completely smooth surface on which to be laid.
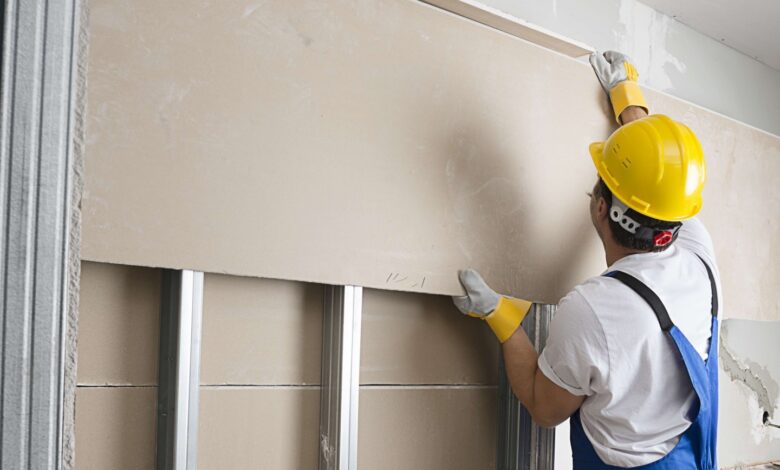
Tip 2 – Hanging the Sheets
To hang the sheets, begin from the top down to the bottom. While hanging the sheets, get someone to help you hold the sheets as you secure them to the studs. You can also make use of a drywall lift if you have one available.
Tip 3 – Securing the Sheets
It’s important that you secure the sheets as you hang them. While you can use nails, screws should your first choice because they are easier to manage especially when there’s need for repair, removal or reinstallation. Be sure not to screw the sheets in too tightly to prevent buckling.
Tip 4 – Cutting to Fit
While hanging the sheets, you will likely encounter obstacles or corners that the straight sheets won’t fit. Trim the sheet to fit these areas using either the saw or the utility knife. The saw will be ideal for straight cuts while the utility knife may be more suited for cutting around corners.
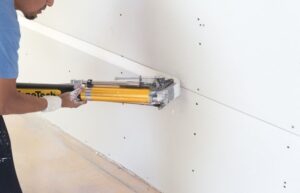
Tip 5 – Applying Joint Compound
When you’re done installing the drywall, you will need to fill the gaps with joint compound. It’s important that this filling is spread out evenly. You can use a trowel for this task. Before you begin to sand and texture it, ensure that the compound has dried completely. You should also use drywall tape on the seams so your work can be smooth while also preventing cracking
Read Also: Dewalt Drywall Screw Gun
Conclusion
Once you’re done with the installation, filling and sanding, you can then texture if you so desire or simply go straight priming and painting. Be sure to us high quality primer and paint. Another way to go about this will be to simply have professionals come handle the project for you. This way, you won’t have to worry about how the project will turn out.


