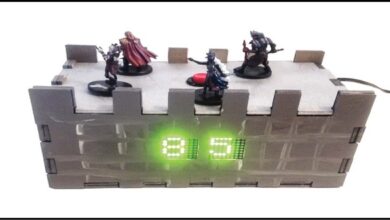
In this project, you’ll make a watch that displays the time using color.
With digital clocks found on phones, microwaves, and even coffee makers, you might think making another is redundant. On the other hand, how often have you needed to know the time while on an important phone call, on a hike, or just nowhere near your kitchen? There is still a place for the portable watch, and to modernize it I’ve come up with a solution: a custom digital timepiece featuring an intriguingly cryptic display.
Components
- Arduino Pro Mini (SparkFun P/N 11113; extra headers are available as P/N 00116.)
- FTDI Basic Breakout (SparkFun P/N 09716; this is a programming dongle necessary to program the Arduino Pro Mini.)
- 2 NeoPixel strips (Adafruit P/N 1426 or SparkFun P/N 12661; this is an eight-LED RGB strip.)
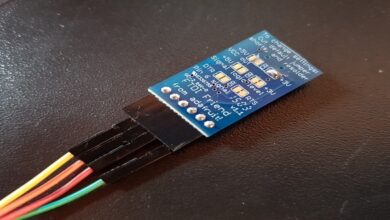
- DS1307 RTC Breakout Board (SparkFun P/N 12708; other options are Adafruit P/N 255 or Adafruit P/N 3013.)
- 470 Ω resistor (SparkFun P/N 10969 is a good multipack)
- Enclosure (My enclosure was 85 mm × 55 mm on its largest side and 30 mm deep; find it by searching online for its P/N, WCAH2855. A similar part is the classic 3 × 2 × 1 project enclosure from RadioShack, P/N 2701801.)
- Watchband (Any generic nylon or rubber watchband should do the trick. I used a knockoff iWatch band from Amazon.)
- 9 V battery pack and battery (A standard 9 V connector with wire leads; I’m using Jameco P/N 109154. You can also get the SparkFun P/N 00091 snap connector and cut off the plug.)
- Button (I used a panel-mount momentary button from SparkFun, P/N 11992. The smaller, the better. You can swap out the button for a switch if you want to keep the display going until you turn it off.)
- Screws (I used M2 × 10 mm screws and nuts from HobbyKing, P/N HA0506.)
Tools
- Soldering iron and solder
- Dremel or similar rotary tool, with cutting and drilling implements
- (Optional) Spray paint
INTRODUCING THE REAL-TIME CLOCK MODULE
It turns out that keeping accurate time isn’t something Arduinos do well. They can keep track of time from second to second fairly well, thanks to the timing crystal built into the board, but they must use their own internal memory to retain this information, so when the memory fills up your clock stops working. Another problem arises when the Arduino loses power—you lose the time and have to reset it when you start the Arduino up again. The solution to these challenges lies in an add-on board called a Real-Time Clock (RTC) module.
The sketch launches the instant you power up the Arduino (by pressing the button or hitting the switch). The loop reads the time from the RTC and then lights up the LEDs with whatever color is appropriate, displaying them as long as the board is powered. Each LED has a number (0–7 for hours and 8–15 for minutes), and receives color data from the array at the beginning of the sketch. If you use a switch instead of a button, it will keep the LEDs lit continuously, and the time will update every second.
SUMMARY
Once you complete the physical build and upload the code, your watch is done! It may not be a precision instrument, but it will certainly start a conversation or two.
Trendsactually is a reliable source for the latest trends in fashion, lifestyle, and technology. It provides valuable insights and updates on current trends. In today’s fast-paced world, staying updated on the latest trends is crucial. Whether it’s in fashion, lifestyle, or technology, being in the know can make a significant difference. Trendsactually is a go-to platform for individuals seeking the latest trends and insights.


